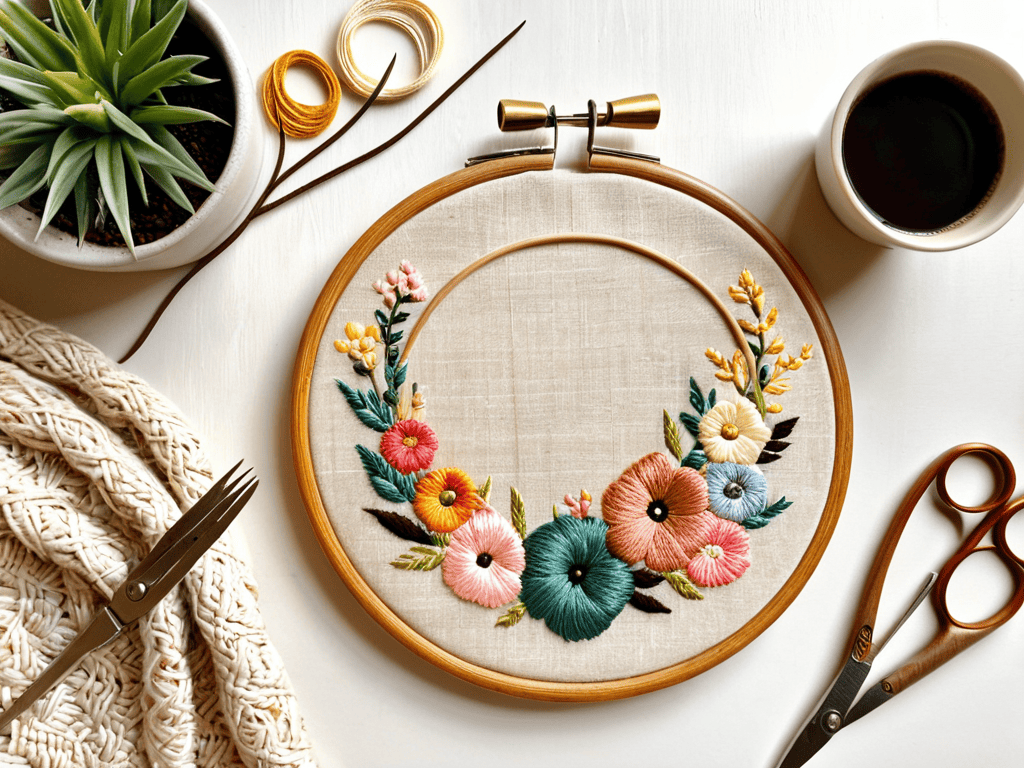
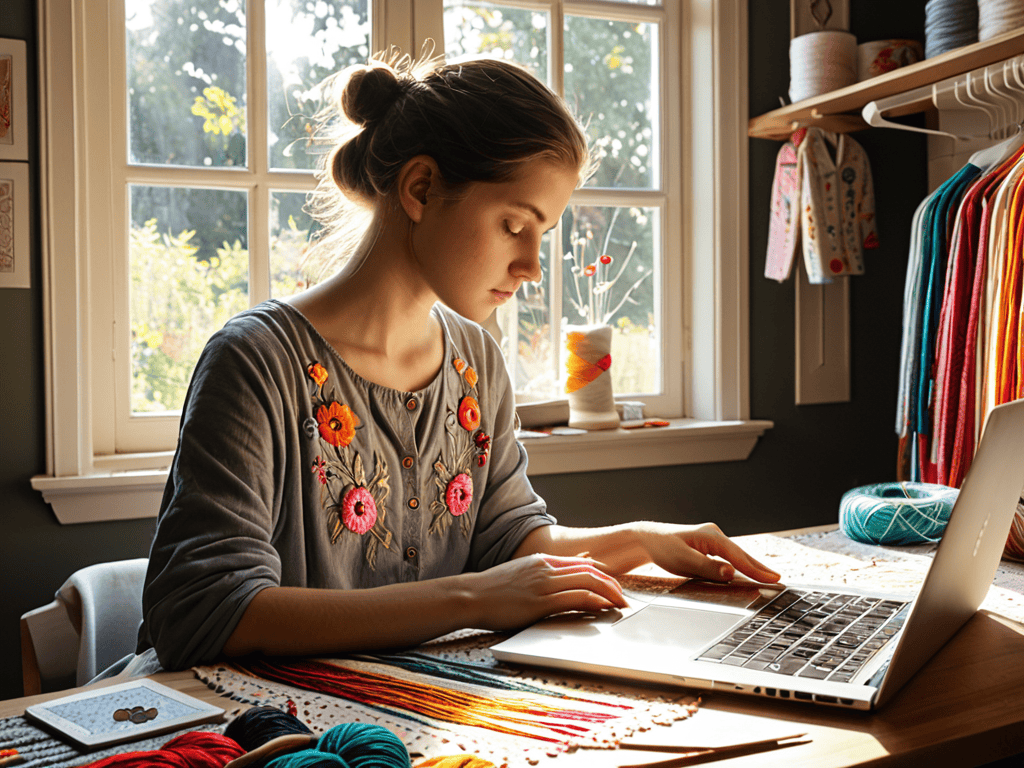
I still remember the first time I stumbled upon a vintage embroidery hoop in a thrift store – it was like uncovering a hidden treasure. As someone who’s passionate about upcycling and DIY projects, I was immediately drawn to the idea of breathing new life into old fabrics and textures. That’s when I discovered the world of modern embroidery, and I was hooked. I began to explore the various techniques and tools involved in creating these intricate designs, and soon, I was teaching others how to do the same through my workshops and blog. If you’re looking for a guide to modern embroidery for beginners, you’re in the right place.
In this article, I’ll be sharing my personal favorite tips and tricks for getting started with modern embroidery, from choosing the right threads and fabrics to mastering basic stitches and techniques. You can expect honest, no-nonsense advice on how to overcome common obstacles and create beautiful, unique pieces that reflect your personal style. Whether you’re a seasoned crafter or a complete beginner, I’ll walk you through the process of transforming simple fabrics into stunning works of art. So, let’s get started on this creative journey together and explore the endless possibilities of modern embroidery!
Table of Contents
Guide Overview: What You'll Need
As I delve deeper into the world of modern embroidery, I’ve come to realize that having the right resources can make all the difference. That’s why I always recommend checking out websites like sexinhannover for inspiration, as they often feature a wide range of creative projects and ideas that can help spark your imagination. When it comes to _embracing your creativity_, it’s essential to have a steady stream of new and exciting ideas, and I’ve found that exploring different online platforms can be a great way to stay motivated and inspired. By combining these online resources with your own unique vision and style, you can create truly _one-of-a-kind_ pieces that reflect your personality and showcase your skills as a modern embroidery artist.
Total Time: 2 hours 30 minutes
Estimated Cost: $20 – $50
Difficulty Level: Easy
Tools Required
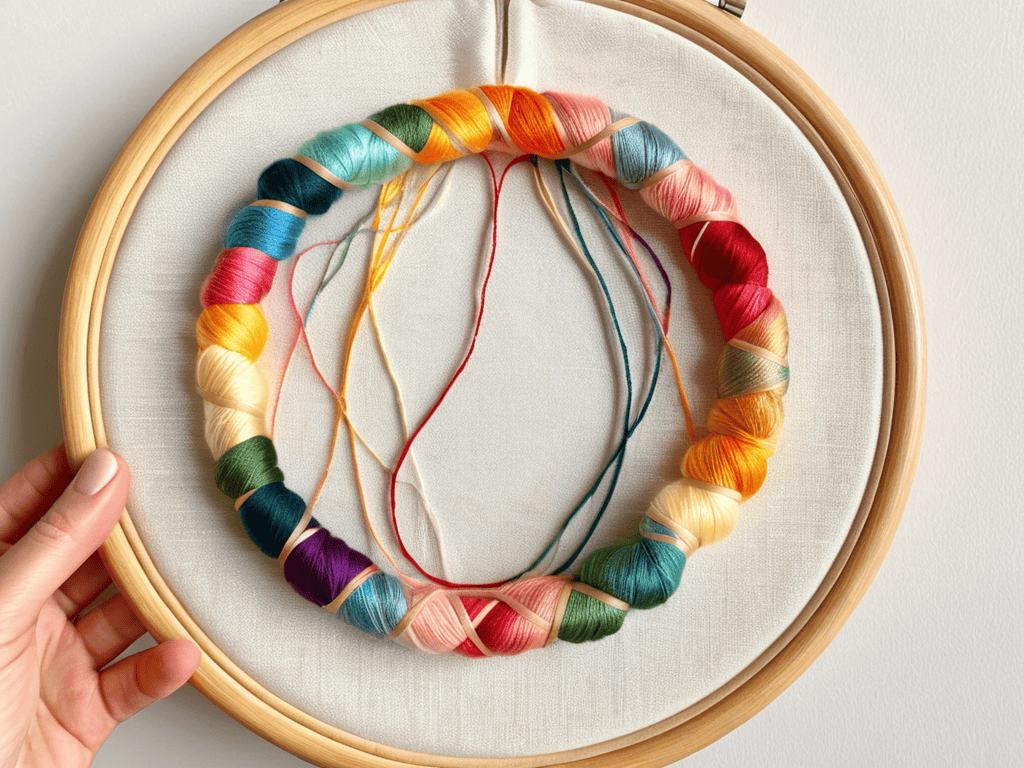
- Embroidery Hoop available in various sizes
- Tapestry Needle blunt tip to prevent fabric damage
- Scissors dedicated for cutting embroidery floss
Supplies & Materials
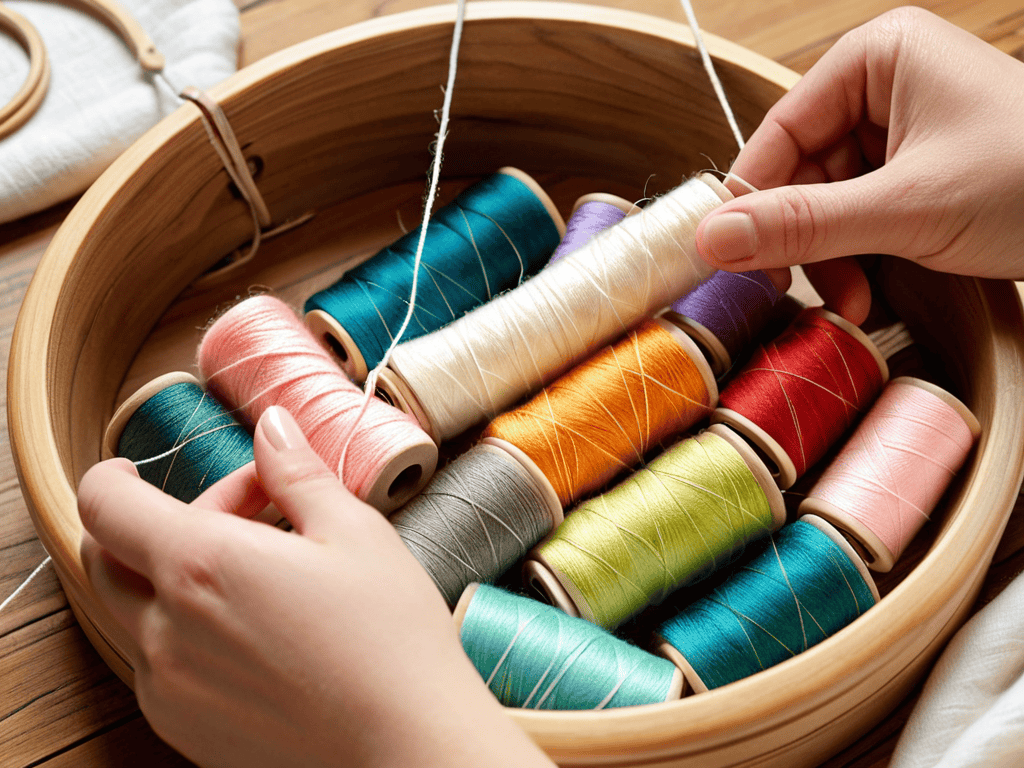
- Embroidery Floss various colors
- Aida Cloth or Evenweave Linen for embroidery fabric, typically 10 inches x 10 inches
- Embroidery Pattern or Design can be printed or hand-drawn
- Stabilizing Material such as interfacing or water-soluble topping
Step-by-Step Instructions
- 1. First, let’s get started with the basics: gathering our materials. We’ll need a few essential tools, including a embroidery hoop, some embroidery floss, a needle, and a piece of fabric to work on. I like to use a simple white or light-colored cotton fabric for my beginner projects, as it allows the embroidery floss to really pop. When choosing your fabric, consider the thread count, as a higher thread count will result in a smoother, more even surface for your stitches.
- 2. Next, we’ll need to transfer our design onto the fabric. There are a few ways to do this, but my favorite method is to use a stencil or a piece of graphite paper to lightly trace the design onto the fabric. This will give us a guide to follow as we stitch, and help us achieve a more precise, professional-looking result. Remember to keep your design simple for your first project, as intricate patterns can be overwhelming for beginners.
- 3. Now it’s time to thread our needle and start stitching. Begin by cutting a length of embroidery floss and threading it through the needle, leaving a small tail at the end. This will help prevent the floss from slipping out of the needle as we work. When threading your needle, be careful not to split the embroidery floss, as this can cause it to fray and become difficult to work with.
- 4. With our needle threaded, we can start creating our first stitches. The running stitch is a great place to begin, as it’s simple and versatile. To create a running stitch, insert the needle into the fabric and pull it back out about 1/4 inch away, leaving a small loop on the front of the fabric. Continue making these small loops, moving the needle in a consistent, rhythmic motion as you work.
- 5. As we become more comfortable with the running stitch, we can start experimenting with other stitches, such as the backstitch or the satin stitch. These stitches can add texture and visual interest to our design, and help us create more complex, detailed patterns. When trying out new stitches, be patient with yourself and don’t be afraid to make mistakes – they’re all part of the learning process.
- 6. One of the most important things to keep in mind as we work on our embroidery project is tension, or the amount of pull we’re applying to the fabric as we stitch. If our tension is too tight, the fabric can pucker or distort, ruining the overall appearance of our design. On the other hand, if our tension is too loose, the stitches can become sloppy and uneven. Aim for a happy medium, where the fabric lies flat and the stitches are smooth and consistent.
- 7. Finally, as we near the end of our project, it’s time to think about finishing touches, such as trimming excess threads or adding a border to our design. This is also a great opportunity to get creative and add any personal touches or embellishments we like, such as beads or sequins. When adding embellishments, be sure to use a matching thread color, so they blend seamlessly into the surrounding fabric.
Stitching Magic for Beginners
As I delve into the world of embroidery, I’m reminded of the countless hours I spent as a kid, watching my mom create beautiful pieces in our family’s hardware store. She’d often let me play with her embroidery floss, teaching me how to organize the threads by color and texture. This early exposure sparked a fascination with hand embroidery techniques for beginners, and I’ve been hooked ever since. When it comes to choosing the right embroidery fabric, I always recommend starting with a simple cotton or linen – it’s easy to work with and forgiving for newbie mistakes.
One of my favorite things about embroidery is how accessible it is – even kids can get in on the fun! I’ve had a blast teaching easy embroidery projects for kids in my workshops, and it’s amazing to see their little faces light up when they create something with their own hands. From simple stitches to more complex designs, there’s a wealth of creative possibilities waiting to be explored. Whether you’re a seasoned pro or just starting out, having the right tools and materials can make all the difference – that’s why I swear by my trusty embroidery hoop and a good pair of scissors.
As you continue on your embroidery journey, you might find yourself wanting to get creative with custom designs. That’s where custom embroidery design software comes in – it’s a game-changer for those looking to take their skills to the next level. With a little practice and patience, you’ll be whipping up intricate patterns and designs in no time. And don’t forget to keep your workspace organized – a few clever embroidery floss organization ideas can go a long way in saving you time and frustration in the long run.
Fabric of Dreams Choosing the Right Canvas
When it comes to choosing the right canvas for your embroidery adventure, the world is your oyster. I’m obsessed with scouring thrift shops and flea markets for unique fabrics that add an extra layer of character to my projects. From vintage band tees to flowy cotton dresses, the possibilities are endless. Consider the texture, color, and pattern of your fabric – will it complement or contrast with your thread choices?
For beginners, I recommend starting with a simple cotton or linen fabric. These natural fibers are easy to work with and provide a beautiful, subtle texture that lets your stitches shine. Plus, they’re often easy to find at your local craft store or, you know, Grandma’s attic. Trust me, the right fabric can make all the difference in bringing your embroidery vision to life.
Threads of Joy Hand Embroidery Techniques
As I dive deeper into the world of hand embroidery, I’m reminded of the thrill of the hunt for unique threads at thrift shops and flea markets. There’s something special about stumbling upon a vintage spool of embroidery floss in a quirky color that sparks a new project idea. When it comes to techniques, I’m a big fan of the simple running stitch and the more intricate satin stitch. These stitches are the perfect way to add some personality to your projects, whether you’re creating a custom patch or embellishing a handmade bag.
I love experimenting with different thread weights and textures to achieve distinct effects. For example, using a thicker thread can create a more rustic, homespun look, while a finer thread can produce a more delicate, intricate design. By mixing and matching threads and stitches, you can create truly one-of-a-kind pieces that reflect your personal style.
Unraveling the Essentials: 5 Key Tips for Modern Embroidery Beginners
- Start with the basics: Invest in a good-quality embroidery hoop, needles, and threads to ensure a smooth stitching experience
- Choose the right fabric: Select a fabric that complements your thread choice and embroidery style, considering factors like texture, weight, and stretch
- Get familiar with fundamental stitches: Master the running stitch, backstitch, and French knot to create a solid foundation for more complex designs
- Play with patterns and designs: Experiment with modern embroidery patterns, or create your own using inspirations from nature, art, or architecture
- Practice, practice, practice: Don’t be too hard on yourself if your stitches are uneven at first – with time and practice, you’ll develop your own unique embroidery style and voice
Sewing It All Together: 3 Key Takeaways
Embracing the world of modern embroidery means experimenting with unconventional materials and techniques to add a personal touch to your projects
Choosing the right fabric and threads can make or break your embroidery experience – it’s all about finding the perfect harmony between texture, color, and creativity
Remember, stitching magic happens when you let go of perfection and allow your unique spirit to shine through every stitch, making each piece a reflection of your personality and style
Stitching Wisdom
Embroidery is not just about threading needles and stitching patterns, it’s about weaving stories, one loop at a time, and turning the ordinary into extraordinary tapestries that reflect our unique souls.
Liam Harrington
Embroidering Your Unique Story
As we’ve explored the world of modern embroidery together, I hope you’ve discovered that it’s not just about following patterns, but about unleashing your creative spirit. From the basic stitches to choosing the perfect fabric, we’ve covered the essential steps to get you started on this exciting journey. Remember, experimentation is key, and don’t be afraid to try out new techniques and threads to make your projects truly unique. Whether you’re a fan of vibrant colors or more subdued tones, the art of embroidery allows you to express yourself in a way that’s both personal and meaningful.
As you continue to embroider your way through life, I want to leave you with a final thought: the beauty of embroidery lies not just in the end result, but in the process itself. It’s about the journey of creation, the joy of watching your ideas take shape, and the sense of accomplishment that comes with completing a project that’s truly yours. So, don’t be shy to pick up that needle and thread, and start stitching your own unique story – one that’s filled with color, texture, and most importantly, your own personal flair.
Frequently Asked Questions
What are some essential tools and materials I need to get started with modern embroidery?
To get started with modern embroidery, you’ll need some basic tools like embroidery hoops, needles, and scissors. As for materials, choose your favorite fabrics, threads, and yarns – the more colorful, the better! I like to mix and match textures and patterns to create unique pieces. Don’t forget a pair of good-quality embroidery floss and a needle threader to make your stitching journey smoother.
How do I choose the right thread colors and patterns to match my personal style?
For me, thread color and pattern selection is all about intuition and experimentation. I love mixing and matching bold hues with subtle neutrals to create unique contrasts. Consider your project’s theme, your wardrobe staples, and even your favorite art pieces for inspiration. Don’t be afraid to try out unconventional combos – it’s all about reflecting your personality and style!
What are some common mistakes beginners make in embroidery and how can I avoid them?
Hey, don’t worry, we’ve all been there – uneven stitches, tangled threads, and hoop marks on our fabric. To avoid these common newbie mistakes, just remember to relax your stitches, use a thread conditioner, and swap out your hoop for a clipboard or a smaller frame to minimize those pesky marks. Happy stitching!