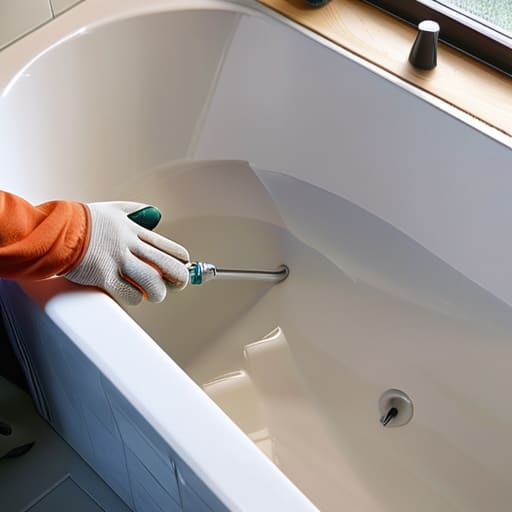
You know that sinking feeling when you’re relaxing in a warm soak, only to spot that nasty, black ring of mold creeping along the edge of the tub? It’s enough to kill the entire vibe. Most people think they need to call in a pricey professional or, even worse, replace the whole unit, but let me tell you a secret: that’s just not true. Learning how to re-seal a bath is actually one of the most rewarding “quick wins” you can tackle in your home. I remember my first attempt back in my dad’s hardware store days—I ended up with a giant, wobbly blob of silicone that looked more like a melted marshmallow than a clean seal! I felt like a total amateur, but that messy mistake taught me everything I know about getting those perfectly smooth lines.
Don’t sweat the small stuff, though; I’ve got your back. In this guide, I’m stripping away the confusing jargon and giving you my honest, no-nonsense approach to tackling this project like a pro. We’re going to walk through everything from scraping off that crusty old gunk to choosing the right sealant that actually lasts. By the time we’re done, your bathroom is going to look crisp, clean, and totally refreshed.
Guide Overview
Tools & Supplies
- Utility knife for removing old sealant
- Caulk gun for applying new sealant
- Caulking removal tool or scraper for cleaning gaps
- Microfiber cloth for cleaning surfaces
- Painter's tape for clean lines
- Sanitary silicone sealant (anti-mold) 1 tube
- Rubbing alcohol or sealant remover for surface prep
- Paper towels for cleanup
Step-by-Step Instructions
- 1. First things first, grab your scraper and let’s clear out that old, crusty sealant—it’s a bit of a messy job, but trust me, it’s the secret to making your bathroom look brand new again! You’ll want to be careful not to scratch your tub while you’re working, so take your time peeling away those gummy, discolored bits until you’re left with a relatively clean surface.
- 2. Once the bulk of the old stuff is gone, it’s time to get really thorough with the cleaning. Grab some rubbing alcohol or a specialized silicone remover and a clean rag to wipe down the entire area. You need to make sure there isn’t a single speck of soap scum or old residue left behind, because if the surface isn’t perfectly pristine, your new sealant just won’t want to stick.
- 3. Now, here is a little pro-tip from my hardware store days: let everything dry completely! I usually grab a hairdryer to speed up the process if I’m in a bit of a rush. If there’s even a tiny bit of moisture trapped in the cracks, you’re basically inviting mold to throw a party under your new seal, and nobody wants that.
- 4. Before we start squeezing out the new stuff, grab some painter’s tape to mask off the edges of your tub and the wall. This is my favorite way to ensure those crisp, professional lines that make a DIY project look like it was done by a pro. Just run the tape along both sides of the gap, leaving just a small space for the sealant to sit.
- 5. It’s time for the main event: applying the silicone! Grab a high-quality, mold-resistant bathroom sealant and a caulking gun. Aim for a steady, even pressure as you move along the joint—think of it like drawing a continuous line with a very thick pen. Don’t worry if it looks a little wonky at first; we’ve got a trick for that in the next step.
- 6. To get that smooth, satisfying finish, dip your finger in a mixture of water and a tiny drop of dish soap, then gently run it along the bead of sealant. This helps smear the silicone into a neat, uniform shape without it sticking to your skin. It’s incredibly therapeutic, honestly, and it’s what gives you that gorgeous, factory-made look.
- 7. Finally, carefully peel away your painter’s tape while the sealant is still slightly tacky. Do this in one smooth motion to avoid disturbing the bead you just worked so hard on. Now, the hardest part of all: step away and let it cure for at least 24 hours. I know it’s tempting to test it out with a soak, but patience is your best friend here!
Scrubbing Away the Past Removing Old Silicone Sealant
Now, before you dive headfirst into the actual application, I have a little pro-tip for you: don’t just wing it with the prep work! I’ve found that if you want that flawless, professional finish without the stress, having a solid game plan for your bathroom layout makes all the difference. If you’re feeling a bit overwhelmed by the technical side of home upkeep, I always find myself browsing www.casualny.com for some extra inspiration and practical advice on keeping your space looking sharp. It’s a great way to get your head in the right space before you start squeezing that sealant tube!
Alright, let’s get down to the gritty part. I know, I know—nobody actually enjoys the cleanup phase, but if you want that professional, seamless finish, you can’t just slap new stuff over the old. Think of it like prepping a canvas for a painting; if the surface is bumpy and gross, your masterpiece is going to look wonky. Grab your scraper or a specialized caulk removal tool and start peeling away those crusty, discolored bits. When it comes to removing old silicone sealant, patience is your best friend. I always tell my workshop students to take their time here; rushing this part is exactly how to fix a leaking bathtub seal incorrectly by trapping moisture underneath.
Once you’ve scraped away the bulk of it, you’ll likely find some stubborn residue clinging to the edges. This is where things get a little “treasure hunter” messy! Grab a rag soaked in a bit of rubbing alcohol or a dedicated sealant remover to get that surface squeaky clean. Getting every last microscopic bit of old gunk out is the absolute secret to preventing mold in bathtub joints down the road. Trust me, a clean surface makes the next step a total breeze!
Finding Your Perfect Match Best Bathroom Sealant for Tubs
Now that we’ve cleared away the old, crusty residue, it’s time for the fun part—picking your secret weapon! Walking down the aisles of a hardware store can feel a bit overwhelming with all those different tubes staring back at you, but here’s the golden rule: don’t just grab the cheapest option you see. You really want to look for something specifically labeled as sanitary silicone caulk. This isn’t just fancy marketing speak; these formulas are specially designed with fungicides to help with preventing mold in bathtub joints, which is a total lifesaver if you’re tired of scrubbing black spots every weekend.
When you’re browsing, keep an eye out for “mildew-resistant” on the label—that’s your best friend for long-term success. While I love a good bargain from my local flea market finds, when it comes to the best bathroom sealant for tubs, I always tell my workshop students to invest a few extra bucks in a high-quality, 100% silicone product. It’s much more flexible than cheap acrylic stuff, meaning it can handle the expansion and contraction of your tub without cracking. Trust me, a little extra spend now saves you from a massive headache (and a leaky floor) later!
Pro Tips to Keep That Seal Looking Sharp (and Not Like a DIY Disaster!)
- Patience is your best friend here—I know it’s tempting to just slap the new silicone on and call it a day, but you absolutely have to let it cure for the full time recommended on the tube. If you jump in the tub too soon, you’re basically undoing all your hard work!
- Don’t skip the cleaning phase! Even after you’ve scraped the old stuff away, give the area a good wipe with some rubbing alcohol. It gets rid of any lingering soap scum or oils so your new sealant actually sticks instead of just sitting on top like a stranger at a party.
- Get a steady hand with some painter’s tape. If you’re worried about making a messy bead, run some tape along the edges of the tub and the wall first. It creates a crisp, professional line that’ll make your friends think you hired a pro.
- Use the “Soapy Finger” trick for a smooth finish. Instead of struggling with the nozzle, dip your finger in a little bit of water mixed with a drop of dish soap. It helps you glide over the sealant for that perfectly even, professional-looking bead without it sticking to your skin.
- Always check the weather (or at least the humidity!). If your bathroom is a total steam room or super damp, try to wait for a drier day to do the job. A little extra airflow while it’s setting makes a world of difference in how well that sealant bonds.
All Set for a Fresh Start
And just like that, you’ve tackled the heavy lifting! We’ve gone from wrestling with that crusty, old silicone to picking out the perfect, high-quality sealant that’s actually built to last. Remember, the real magic happened in those prep stages—taking the time to thoroughly clean the surface and ensuring everything was bone-dry before you even touched that caulk gun. It might have felt a bit tedious at times, but seeing that smooth, clean line where the tub meets the wall makes every bit of scrubbing worth it. You’ve effectively protected your home from sneaky leaks and given your bathroom a much-needed facelift, all without needing a massive renovation budget.
At the end of the day, DIY isn’t just about fixing things that are broken; it’s about the incredible feeling of taking ownership of your space. There is something so deeply satisfying about looking at a project and knowing, “I did that with my own two hands.” Whether you’re upcycling a vintage find or just refreshing a bathroom seal, you’re proving that you don’t need a professional crew to make a meaningful impact. So, wipe the dust off your hands, admire your handiwork, and get ready for your next adventure. I can’t wait to see what you decide to transform next!