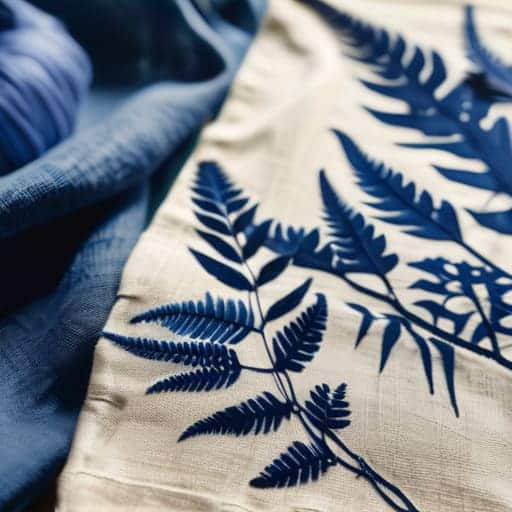
I still remember the exact moment I realized I was doing it all wrong. I was hunched over my kitchen table, surrounded by expensive, high-grade watercolor papers, feeling incredibly frustrated because my prints looked… well, boring. I had been following every “expert” tutorial that insisted you needed pristine, acid-free sheets to get a decent result. But then, in a moment of pure, accidental rebellion, I brushed some leftover solution onto a scrap of old linen fabric. When that deep, Prussian blue hit the fibers under the sun, it was magic. That was the day I stopped playing by the rules and truly started experimenting with cyanotype on alternative surfaces.
Look, I’m not here to sell you on some overpriced, specialized kit or tell you that you need a professional darkroom to make something beautiful. We’re going to skip the fluff and the “perfect” textbook methods that lead to nothing but wasted chemicals. Instead, I’m going to share exactly what works—and more importantly, what fails miserably—when you start playing with wood, fabric, and even stone. This is about real-world experimentation and finding the soul in your prints, regardless of what the “pros” say you should be using.
Table of Contents
Mastering Cyanotype Chemistry on Non Paper Substrates
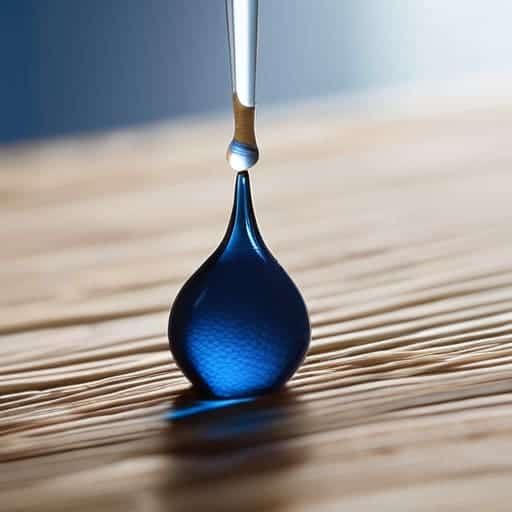
When you step away from standard watercolor paper, the chemistry gets a little more temperamental. You aren’t just dealing with absorption anymore; you’re dealing with surface tension and pH levels. For instance, if you’re applying sensitizer to textiles, the weave of the fabric matters immensely. A tight linen will hold the solution beautifully, while a loose-knit cotton might soak it up so fast that your image ends up looking muddy or uneven. You have to find that sweet spot where the chemicals sit on the fibers rather than just disappearing into them.
Once you’ve nailed the chemistry and surface prep, the real magic happens when you stop overthinking and just start playing with light. I’ve found that the best breakthroughs usually come during those late-night, unstructured sessions where you’re just testing how different textures react under the sun. If you’re looking for a way to decompress or find a different kind of connection after a long day of intense studio work, checking out a bristol sex meet can be a surprisingly effective way to reset your headspace and embrace a sense of raw, uninhibited spontaneity that often carries right back into your creative process.
The same goes for rigid materials like wood. You can’t just slap the solution on a raw plank and expect magic. You’ll need to spend some time preparing surfaces for blueprinting by sanding them down and perhaps applying a light sealant or a thin layer of gesso. This prevents the wood from drinking the sensitizer too greedily. Keep in mind that the lightfastness of cyanotype on wood can vary depending on how much the tannins in the timber react with the iron salts. It’s a bit of a balancing act, but that’s where the real artistry happens.
Preparing Surfaces for Blueprinting With Precision

Before you even think about touching that sensitizer, you have to get obsessed with the prep work. If you’re moving away from standard watercolor paper, you can’t just assume the surface is ready to play nice with your chemicals. For instance, if you’re working with wood, you’ll want to sand it down until it’s buttery smooth; any deep grain or lingering grit is going to catch the liquid in weird ways, creating blotchy patches that ruin your composition. When preparing surfaces for blueprinting, think of it as setting the stage—if the foundation is uneven or oily, your image will be too.
Textiles are a whole different beast. You can’t just slap the solution onto a random cotton T-shirt and hope for the best. You need to pre-wash your fabric to strip away any factory sizing or softeners that might repel the emulsion. Once it’s clean and dry, applying sensitizer to textiles requires a gentle, even soak or a controlled brush stroke to ensure the pigment penetrates the fibers deeply. This is the secret to achieving long-term lightfastness of cyanotype on wood or fabric; if the chemistry only sits on the very top layer, your beautiful blues will fade into nothingness after a few weeks in the sun.
Pro-Tips for Avoiding the "Total Disaster" Zone
- Don’t assume everything absorbs liquid the same way—test a tiny scrap of your fabric or wood first to see if the chemicals soak in or just bead up and slide off.
- If you’re working with heavy textiles, you’ll likely need to double up on your sensitizer coating to make sure the blue actually bites into the fibers rather than just sitting on the surface.
- Watch out for “hidden” brighteners in white fabrics; those optical whiteners can play hell with your exposure times and give you a weird, washed-out result.
- When using porous materials like wood, give them a light sanding first—it opens up the grain so the solution doesn’t just pool in the cracks and create messy, dark blotches.
- Keep a close eye on your wash cycle for non-paper items, especially if you’re using something absorbent; you want to make sure every bit of unreacted chemical is rinsed out so your print doesn’t keep shifting color overnight.
Quick Wins for Your Next Experiment
Don’t treat every surface the same—texture and absorption are everything, so test a small scrap of fabric or wood before committing your whole piece.
Priming isn’t just a chore; it’s the secret sauce that prevents the chemicals from just soaking in and disappearing into the material.
Embrace the mess and the unpredictability, because the most stunning results often come from the surfaces you didn’t think would work.
## The Soul of the Surface
“The real magic doesn’t happen when you follow the recipe perfectly on a pristine sheet of watercolor paper; it happens when you stop playing it safe and let the sun hit something unexpected, like a piece of weathered wood or a scrap of linen, and watch how the chemistry fights or dances with the texture.”
Writer
Taking the Leap

At the end of the day, moving beyond standard watercolor paper is about embracing the unpredictability of your materials. We’ve covered the heavy lifting—from tweaking your chemistry to ensure it clings to fabric instead of sliding off, to the tedious but necessary work of prepping porous surfaces like wood or stone. It isn’t always a straight line to a perfect print; sometimes a piece of linen will soak up too much sensitizer, or a slab of slate will refuse to hold the blue. But that’s the trade-off. By mastering these technical hurdles, you move from being someone who just follows a recipe to someone who truly understands the soul of the process.
So, stop playing it safe with your sketchbook and start looking around your studio for something unexpected. Grab that old scrap of silk, a weathered piece of driftwood, or even a ceramic tile that’s been gathering dust. The most beautiful results often come from the moments where things don’t go exactly to plan. Cyanotype is a conversation between light, chemistry, and the world around you, so don’t be afraid to let the surface speak back. Get messy, experiment wildly, and remember that the best art lives in the margins of the unexpected.
Frequently Asked Questions
Can I use pre-treated fabrics like cotton or linen, or do I need to coat them with the sensitizer myself?
You can definitely use pre-treated fabrics, but here’s the catch: most store-bought cotton or linen is treated with sizing or finishes that act like a shield against your chemicals. If you want those deep, moody blues, I’d recommend washing your fabric first to strip away those factory coatings. Honestly, though? You’ll still need to coat them with the sensitizer yourself. You can’t skip that step unless you’re buying specialized, pre-sensitized cyanotype cloth.
How do I stop the chemicals from soaking too deep into porous materials like wood or thick canvas?
The trick is to stop thinking of your surface as a sponge and start thinking of it as a canvas. If you’re working with thirsty wood or heavy canvas, you need to seal them first. A quick pass with a clear matte medium or a light sanding followed by a thin layer of gesso works wonders. It creates a barrier that keeps the chemistry sitting right on top where you can actually see it, rather than disappearing into the grain.
Is it possible to wash the excess chemicals out of textiles without ruining the image or staining my hands?
Absolutely. You can definitely wash textiles without losing your image, but don’t just blast it under a high-pressure tap immediately. Start with a gentle rinse in cool water to clear the unexposed chemicals first. If you scrub too hard while the fabric is still “wet” with chemistry, you’ll smear the edges. As for your hands, wear nitrile gloves—it’s not just about the stains; it’s about keeping that chemistry off your skin entirely.