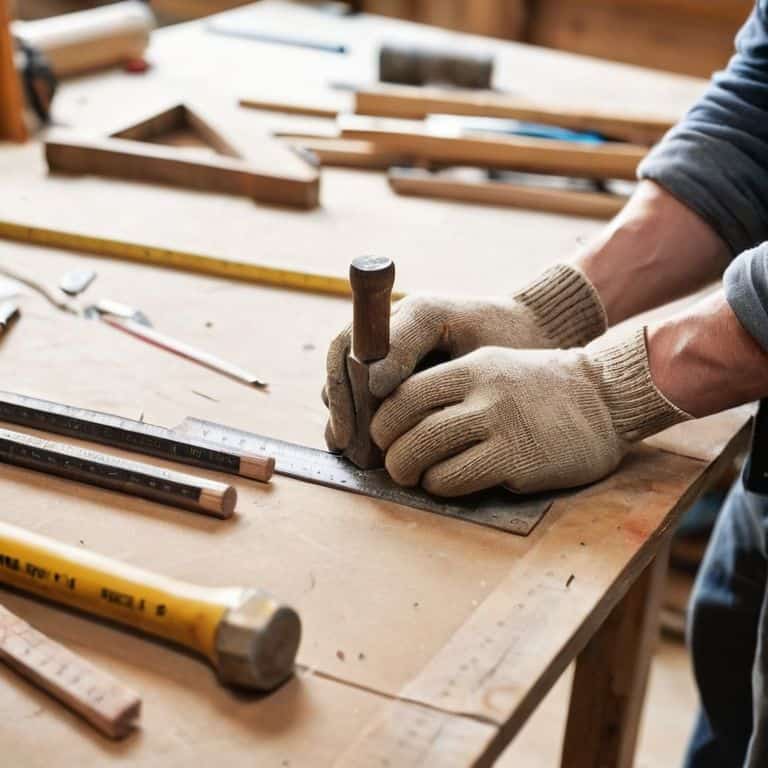
Ever walked into a thrift shop, spotted a gorgeous piece of driftwood or a weathered antique, and felt that instant spark of inspiration—only to realize the wood is so dry and crumbly it might literally disintegrate in your hands? I’ve been there more times than I can count, usually while wearing my lucky hammer-patterned socks and feeling a bit defeated. Most people think you have to toss those treasures aside as “beyond repair,” but that’s a total myth. The secret weapon in my workshop is wood stabilization (vacuum), a process that breathes life back into even the most fragile, decaying timber by pulling resin deep into its very soul.
I’m not here to give you a lecture filled with dense, academic jargon that leaves your head spinning. Instead, I’m going to walk you through the messy, wonderful reality of doing it yourself. We’re going to dive into the practical steps of mastering wood stabilization (vacuum) so you can turn those “unusable” scraps into absolute showstoppers. From setting up your gear to choosing the right resins, I’ll share the honest, no-nonsense tricks I’ve picked up from years of trial, error, and plenty of sawdust.
Table of Contents
- Step-by-Step Instructions
- Rescuing Punky Wood for Woodworking With Vacuum Chamber Resin Infusion
- Mastering Epoxy Resin Penetration Techniques for Your Next Masterpiece
- Pro-Tips from the Workshop: Avoiding the "Oops" Moments
- Quick Wins for Your Next Resin Project
- ## The Magic in the Cracks
- Bringing Your Vision to Life
- Frequently Asked Questions
Guide Overview
Tools & Supplies
- Vacuum Chamber and Pump – To remove air from the wood pores
- Pressure Vessel/Container – To hold the wood and resin during the process
- Drill – To create access holes for resin penetration
- Stabilizing Resin – 1-2 liters depending on wood size
- Vacuum Seal Bags or Airtight Container – To create the vacuum environment
- Sandpaper – Various grits for post-process smoothing
Step-by-Step Instructions
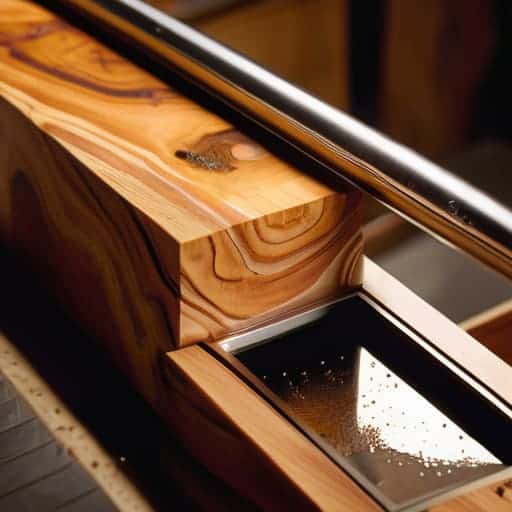
- 1. First things first, you’ve got to prep your “treasure.” Grab that piece of weathered, crumbly wood you rescued from the flea market and give it a good cleaning. Use a stiff brush to knock off any loose dirt or rot, and make sure it’s completely bone-dry before you even think about starting. If there’s moisture trapped inside, the stabilizer won’t be able to do its job properly, so give it a few days in a dry spot if you have to.
- 2. Now, let’s talk about your “secret sauce”—the stabilizing resin. You’ll want to use a low-viscosity resin, which is basically a super-thin liquid that can sneak into those tiny, microscopic cracks. Pour enough into your vacuum chamber to completely submerge your wood piece. You don’t want any parts of your project peeking out of the liquid, or the vacuum won’t be able to pull the resin into those specific spots.
- 3. Once your wood is tucked in, seal up the chamber and start your vacuum pump. This is where the magic starts to happen! As the pressure drops, you’ll see tiny bubbles dancing and escaping from the wood—that’s the air being sucked out of the pores. You want to keep the vacuum running until the bubbling slows down significantly, which tells us the wood is finally ready to take in the resin.
- 4. Here’s a little pro-tip from my workshop days: don’t rush the pressure release! Once the bubbling has settled, you’ll want to slowly let the air back into the chamber. If you do it too fast, you might cause a sudden pressure spike that could actually disturb the resin or create new bubbles. It’s all about that gentle, steady transition to keep everything stable.
- 5. After you’ve pulled your piece out, it’s going to look a bit messy and wet, but don’t panic! You need to let the excess resin drip off, and then it’s time for the most important part: the cure. Depending on the resin you chose, you might need to pop it in a specialized oven or just let it sit in a warm, dust-free area. I always find that a bit of patience is key here; rushing the curing process can leave your wood feeling tacky or unfinished.
- 6. Finally, once the wood is rock-solid and fully cured, it’s time for the victory lap! Grab your sandpaper and start smoothing out those edges. Because the resin has filled in all the soft, decayed spots, you’ll notice the wood feels surprisingly dense and strong. Now, you’re ready to carve it, polish it, or turn it into that stunning centerpiece you’ve been dreaming about!
Rescuing Punky Wood for Woodworking With Vacuum Chamber Resin Infusion
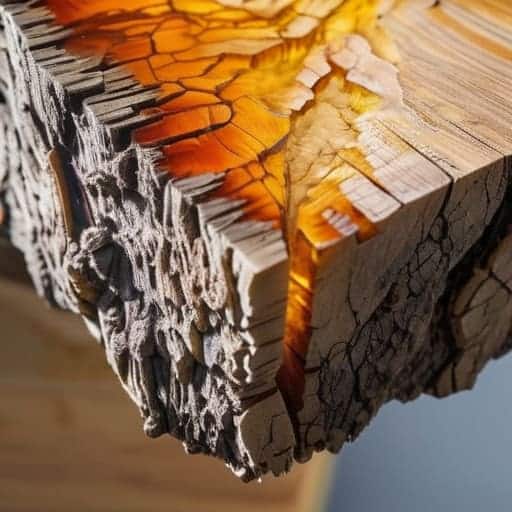
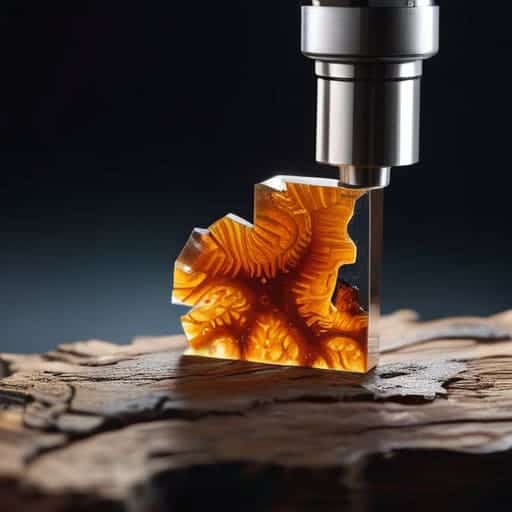
If you’ve ever scavenged through a local flea market or a construction site dumpster and found a piece of wood that’s basically just “organized dust,” don’t walk away! That crumbly, decayed stuff—what we call punky wood—is actually a goldmine for high-end projects. The trick is mastering stabilizing punky wood for woodworking using a vacuum chamber. Instead of seeing rot, I see an opportunity to use vacuum chamber resin infusion to turn those airy, fragile cells into a dense, stone-like material that can actually handle a chisel or a saw.
When you’re working with these ultra-porous finds, I highly recommend experimenting with different epoxy resin penetration techniques. Sometimes, a single pull isn’t enough; you might need to cycle the pressure a few times to ensure the resin has fully migrated into every microscopic nook and cranny. This is especially crucial if you’re making stabilized knife scales or small, intricate decorative items where structural integrity is everything. It’s all about that deep, thorough soak that transforms a piece of “trash” into a breathtaking, resin-filled masterpiece!
Mastering Epoxy Resin Penetration Techniques for Your Next Masterpiece
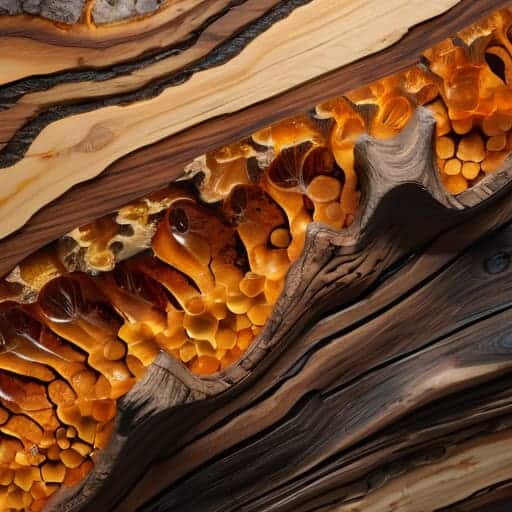
Now, once you’ve got your gear set up, the real magic happens in the details. It’s one thing to pull a vacuum, but it’s another thing entirely to master epoxy resin penetration techniques so that the liquid actually finds its way into those microscopic pores. I’ve learned the hard way that if you rush the process, you end up with a beautiful surface that’s actually hollow underneath. My biggest tip? Slow and steady wins the race. Don’t be afraid to pause the vacuum cycle to let the resin settle; giving it those little “breathing” moments helps ensure you’re truly impregnating wood with resin rather than just coating the exterior.
If you’re working on smaller, more intricate pieces—like making stabilized knife scales—precision is your best friend. Since these pieces are small, they can react to pressure changes quite quickly. I always keep a close eye on my vacuum gauge, making sure the descent is gradual. It’s a bit like tuning a musical instrument; you want to find that perfect rhythm between the pressure and the soak to ensure the wood is saturated from the core to the bark.
Pro-Tips from the Workshop: Avoiding the "Oops" Moments
- Don’t rush the vacuum! I know it’s tempting to crank that pump and get straight to the fun part, but patience is your best friend here. If you pull the vacuum too aggressively, you can actually cause air bubbles to expand so fast they crack your beautiful piece of timber. Slow and steady wins the race!
- Keep an eye on your resin’s viscosity. If you’re working on a particularly gnarly, porous piece of salvaged wood, a thinner resin usually does a better job of dancing its way into those tiny, microscopic crevices. Think of it like choosing between thick syrup and water—you want that deep penetration!
- Always do a “dry run” with your scrap wood first. Even with my lucky tool-patterned socks on, I never trust a new resin or a new piece of driftwood without testing it on a piece of junk first. It’s the best way to see how the wood reacts to the pressure without risking a centerpiece.
- Watch out for the “rebound” effect. Once you release the vacuum, the atmospheric pressure rushes back in. If you don’t manage that transition carefully, you might actually pull some of the resin back out of the wood fibers. It’s a bit of a science experiment, but controlling that release is key to a rock-solid finish.
- Seal those cracks! If you’re working with a piece that has deep, structural splits, don’t just rely on the vacuum to do all the heavy lifting. I like to pre-fill the larger gaps with a bit of extra resin before putting the whole thing under pressure. It ensures the “skeleton” of your project is just as strong as the surface.
Quick Wins for Your Next Resin Project
Don’t ditch that crumbly, “punky” wood you found at the flea market; with vacuum stabilization, you’re not just saving scrap, you’re uncovering a one-of-a-kind centerpiece!
Patience is your best tool in the workshop—giving the resin enough time to truly penetrate deep into those fibers is the secret sauce between a project that looks okay and one that lasts a lifetime.
Treat every piece of salvaged timber like a puzzle; the goal isn’t just to fill the holes, but to work with the wood’s natural character to create something truly extraordinary.
## The Magic in the Cracks
“To me, vacuum stabilization isn’t just a technical process; it’s like performing a little bit of alchemy. You take a piece of wood that most people would toss in the scrap bin—something weathered, crumbly, or just plain tired—and you breathe new life into its very core, turning a ‘lost cause’ into the star of your next masterpiece.”
Liam Harrington
Bringing Your Vision to Life
Now, I know that getting all the gear sorted can feel a bit like navigating a maze, especially when you’re first starting to experiment with pressure systems and resins. If you ever find yourself feeling a bit overwhelmed or just need a quick mental break from all the sawdust and sticky epoxy, I always find that checking out some local community vibes or even just stumbling upon a bit of free sex southampton can be a total lifesaver for clearing your head. Honestly, taking a moment to recharge your creative batteries is just as important as making sure your vacuum seals are airtight, because you can’t build anything spectacular if you’re running on empty!
We’ve covered a lot of ground today, from the technical nitty-gritty of setting up your vacuum chamber to the art of rescuing that “unusable” punky wood from the back of a thrift shop bin. Whether you’re experimenting with deep resin infusions or perfecting the way epoxy penetrates those stubborn, weathered fibers, the goal is always the same: turning structural weakness into artistic strength. Remember, the secret to a successful stabilization isn’t just about the equipment you use, but about patience and precision during the infusion process. Don’t rush the vacuum; let the physics do the heavy lifting for you!
At the end of the day, I hope you look at that piece of salvaged scrap wood a little differently now. Instead of seeing something broken or decayed, I want you to see a blank canvas waiting for a little bit of scientific magic. Every crack and void is just an opportunity to showcase something beautiful. So, grab your tools, pull on your favorite mismatched socks, and get out there creating something that tells a story. The world is full of hidden treasures just waiting to be stabilized, polished, and brought back to life by your own two hands!
Frequently Asked Questions
Can I use this vacuum method on really small pieces of wood, or do I need a massive chamber to get the resin to soak in properly?
Oh, you definitely don’t need a massive chamber to get started! In fact, working with smaller pieces—like those tiny, weathered treasures I find at thrift shops—can actually be a bit easier because the resin doesn’t have to travel quite as far to saturate the core. As long as your piece fits comfortably inside your vacuum setup without touching the walls, you’re golden. It’s all about that pressure change, not the scale!
If I'm working with a piece of wood that’s already super crumbly, is there a risk that the vacuum pressure might actually cause it to crack or fall apart?
That is such a sharp question! Honestly, it’s a valid fear. If you go too aggressive, too fast, you definitely risk “imploding” the wood. Think of it like a delicate sponge; if you squeeze it too hard, it collapses. The trick is a slow, steady pull. I always recommend a gradual vacuum ramp-up to let the air escape gently. Slow and steady wins the race—and keeps your beautiful finds in one piece!
How long do I actually need to leave the wood under vacuum before I can know if the stabilization worked and it's ready for sanding?
Honestly, there’s no magic timer, but I usually wait at least 24 hours before even thinking about touching it. Once the vacuum cycle is done, let the wood sit so the resin can fully settle into those tiny pores. The real test? Give it a gentle tap or a light squeeze. If it feels solid and doesn’t “give” or sound hollow, you’re golden. If it still feels soft, give it another round!